Nabooti Island
Nabooti Island is a lengthy quest in Poptropica that takes you across the continent of
Africa on a very exciting adventure in search of several lost jewels with
mysterious powers. In the course of this adventure, you’ll explore pyramids, go
deep into a diamond mine, and even encounter strange ghosts from the past. Get
ready for an incredible journey! This walkthrough will show you everything you
need to know to complete Poptropica Nabooti Island.
Written Walkthrough
The Museum
Your very first stop is the Nabooti African Museum, which is just to your left
when you arrive on Nabooti Island. Go inside the museum, run to the left and
drop down to the first floor. Then walk over to the right until you get to the
Nabooti Monument. Spek with the woman standing next to it and she will tell you
the tale of the missing jewels. When she asks you to help find the jewels,
accept her offer and she will give you a map of Africa.
Now head outside the museum and walk to the far left. You’ll see a plane.
Click on the seat (the cursor should say ‘Fly!’) A map of Africa will appear and
the plane will follow your mouse cursor. Fly to the right until you see a dot
labeled, Mountains of the Moon. Click on this dot and
your plane will land there.
Mountains of the Moon
The first part of this area can be incredibly frustrating. The basic idea is to
get all the way to the top while avoiding the boulders that come crashing down
on you. The goats will also head-butt you if you get too close to them. To
start, run to the left and jump over the goats in your path. When you get to the
far left, stop and let the goat come and butt you. He will send you flying in
the air and you’ll land safely on the ledge above.
Jump onto the trees to the right of the ledge and then jump up when you
see a woman above you. Speak with her and she’ll tell you she’s having trouble
getting one of the cactus figs on the cliff. Jump up to the left and collect the
Opuntia Fruit (a.k.a. cactus fig). Then run to the right and jump over the
waterfall, and head back up to the left, avoiding the goats and boulders if
possible. Keep jumping up on the icy ledges until you get to the upper-right
corner. You’ll see an old man above you but you can’t jump directly to him.
Instead, do a running jump to the left to get to the platform and then jump back
across to stand next to the old man in front of the cave.
The old man will challenge you to a game of Mancala. Once you begin the
game, you’ll learn the rules if you don’t already know them. When you win, you
can enter the cave behind him.
Drop down the left side to get to the bottom, where you’ll find an old
cell phone. There are some cool cell phone
tricks you can use to get special costumes, but for now, just keep going. Jump
up the platforms to return to the starting location and then jump onto the
narrow platforms to the right. You need to keep moving to avoid the falling
icicles and you might fall a few times before you get across. If you do, just
return up the platforms on the left and try again. Once you reach the end on the
far right, you’ll find one of the Lost Jewels of Nabooti. This is the red jewel.
Now return to the cave entrance and go outside. Then jump down to the right and
make your way back to the plane.
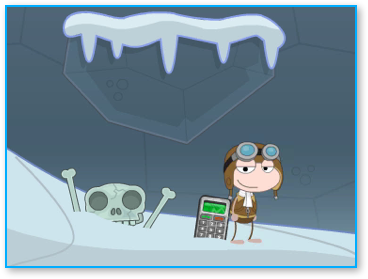
I guess the cell phone reception in this cave wasn't
strong enough to save this guy.
strong enough to save this guy.
Blue Nile Falls
Fly the plane to Blue Nile Falls on your map. When you arrive, jump up onto the
platforms and go up to the top where you will see a purple flower called an Egyptian Blue Lily. Jump on top of it to put it
in your inventory. Now jump down and to the right across the waterfall to get to
another set of platforms and climb up those.
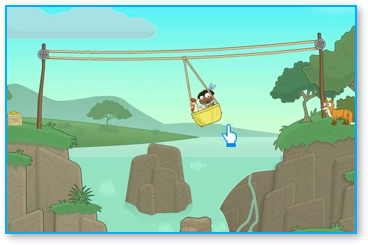
You’ll arrive on a platform where there’s a woman standing with a chicken,
a fox, a bag of feed and a basket attached to a rope and pulley. Talk to her and
you’ll discover she needs help getting all three items across. Offer to help
her. This is a classic puzzle where only one of the three items can be moved at
a time, and certain pairs of items (like the fox and the chicken) can’t be left
together unattended. Here’s the correct order of how to move everything
across.
platforms and go up to the top where you will see a purple flower called an Egyptian Blue Lily. Jump on top of it to put it
in your inventory. Now jump down and to the right across the waterfall to get to
another set of platforms and climb up those.
You’ll arrive on a platform where there’s a woman standing with a chicken,
a fox, a bag of feed and a basket attached to a rope and pulley. Talk to her and
you’ll discover she needs help getting all three items across. Offer to help
her. This is a classic puzzle where only one of the three items can be moved at
a time, and certain pairs of items (like the fox and the chicken) can’t be left
together unattended. Here’s the correct order of how to move everything
across.
- Bring the chicken to the left side and go back with an empty basket.
- Bring the feed to the left side and go back with the chicken.
- Bring the fox to the left side and go back with an empty basket.
- Bring the chicken to the left side.
You need to move the fox, chicken and feed over in the correct order.
Congratulations! You did it. Your reward for helping the woman is that she tells
you about a hidden cave behind a bush on the right side of the waterfall. Jump
down and to the right. If you set it up correctly, you’ll land right in front of
the cave. Click on it to go inside.
There are several narrow platforms you need to jump across inside the
cave. If you fall down, just jump back up on the left side and try again. Watch
out for the stalactites that fall from the ceiling. When you get to the end,
you’ll find the purple jewel of Nabooti. Once you have it, head back outside and
return to your plane.
Return to Nabooti
Now you must make a quick return trip to Nabooti to make a trade with one of the
merchants. Fly there and then speak to the woman wearing the orange clothing.
She will offer to trade your Egyptian Blue Lily for a Desert Turban. Say yes and
once the trade is complete, head back to your plane.
merchants. Fly there and then speak to the woman wearing the orange clothing.
She will offer to trade your Egyptian Blue Lily for a Desert Turban. Say yes and
once the trade is complete, head back to your plane.
Giza
The next stop is Giza at the mouth of the Nile River near the top of the map. As
soon as you arrive, open up your backpack and put the Desert Turban on. This
will disguise you to look just like one of the tomb raiders digging at the
pyramid. Walk over to the first one and he will give you a shovel. Pay close
attention to the shovel handle. It has the name Vince Graves and a phone number
(555-6789) carved into it. Now pull out your cell phone and dial that number. It
will cause the phone to ring in the tent to the right and the boss will go
inside the tent to answer it. As soon as he does, the workers all run away.
Go to the outside of the tent and click on the backpack sitting on the
ground. Inside there is a Moon Stone. Take it and then jump up on top of the
Sphinx’s head. Then use the moon stone. It will cause a moonbeam to appear and
magically open the tomb door at the bottom of the Sphinx. Jump down and go
inside.
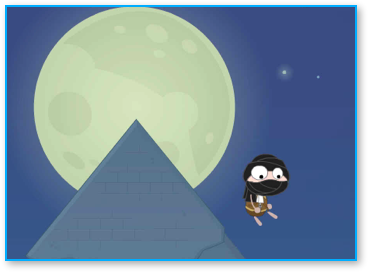
Wheeee! Jumping off the top of the Sphinx in Giza.
You’re now inside the tomb and you’ll encounter a series of tricky puzzles that
you need to solve. The first puzzle is some rotating blocks. Walk all the way to
the right and click on the panel you see. Now you need to get all four pieces to
be horizontal. Clicking on one causes the other three to rotate. The correct
order to click is (looking from left to right) the first piece, then the third
piece, and finally the fourth piece. When all four pieces are horizontal, the
platforms to the right will form a bridge that you can cross. Keep moving to the
right and then jump up. You’ll soon arrive at the second puzzle.
In the second puzzle, you need to push the blocks on top of the platform
down and arrange them underneath to match the layout on the wall. It’s a little
tougher than it first seems because you need to do things in a certain order. If
we number the blocks from 1 to 4 going from left to right, here is what to
do.
All of the blocks should now line up in the correct order in the middle.
Once you get them exactly right, a hidden door up above will open up. If you
mess up, you can pull the reset handle and start over. Once the door opens, jump
to the right of the blocks and push them all the way to the left wall. Then jump
up on the blocks and jump up to the platform that just opened up. Run through
the hall and jump down and go to the left, past the pottery on the ground.
You’ll arrive at the next puzzle.
Now you must jump up another series of platforms. Each one has different
hieroglyphics (pictures) on it and you must jump on them in the correct order or
they will all come crashing down and you’ll have to start at the beginning. The
correct order is as follows:
Now you can jump onto the row of bricks above your head. Walk a little to
the left and climb the rope. When you land on the rope, the bricks below you
will crash to the ground. When you reach the top of the rope, you will arrive at
the final (and hardest) puzzle in the tomb.
In the final puzzle room, there are four columns and each one has a switch
on it. Clicking the switch causes sand to fall and start filling up the room.
You need to click on the switches in the correct order and you need to move very
quickly. The correct order is the fourth column, followed by the second column,
then the third column, and then finally the first column. When you get all four
switches, the sand will stop flowing and the sarcophagus in the the middle of
the room will open to reveal blue Nabooti jewel. Walk over to claim it and then
run out of the Sphinx and return to your plane.
you need to solve. The first puzzle is some rotating blocks. Walk all the way to
the right and click on the panel you see. Now you need to get all four pieces to
be horizontal. Clicking on one causes the other three to rotate. The correct
order to click is (looking from left to right) the first piece, then the third
piece, and finally the fourth piece. When all four pieces are horizontal, the
platforms to the right will form a bridge that you can cross. Keep moving to the
right and then jump up. You’ll soon arrive at the second puzzle.
In the second puzzle, you need to push the blocks on top of the platform
down and arrange them underneath to match the layout on the wall. It’s a little
tougher than it first seems because you need to do things in a certain order. If
we number the blocks from 1 to 4 going from left to right, here is what to
do.
- Push block 4 down on the right side of the platform and then push it to the
left so that it’s a little bit past the left edge of the platform above. - Push blocks 1 and 2 down on the left side of the platform and then push them
to the right so that they’re past the right edge of the platform above. - Jump on top of blocks 1 and 2 and stand in the middle and then click down to
get inbetween them. Then push block 1 back to the left until it’s touching block
4. - Go back up on the platform and push the remaining block 3 down to the
right. - Jump down and get on the right side of block 2, which is now the last block
on the right. Push it towards the middle. - Jump over to the left and push the other blocks towards the
middle.
All of the blocks should now line up in the correct order in the middle.
Once you get them exactly right, a hidden door up above will open up. If you
mess up, you can pull the reset handle and start over. Once the door opens, jump
to the right of the blocks and push them all the way to the left wall. Then jump
up on the blocks and jump up to the platform that just opened up. Run through
the hall and jump down and go to the left, past the pottery on the ground.
You’ll arrive at the next puzzle.
Now you must jump up another series of platforms. Each one has different
hieroglyphics (pictures) on it and you must jump on them in the correct order or
they will all come crashing down and you’ll have to start at the beginning. The
correct order is as follows:
- Jump on the picture of the person.
- Jump on the picture of the boat on water.
- Jump on the picture of the bird with the staff.
- Jump on the picture of the eye over the long shape.
Now you can jump onto the row of bricks above your head. Walk a little to
the left and climb the rope. When you land on the rope, the bricks below you
will crash to the ground. When you reach the top of the rope, you will arrive at
the final (and hardest) puzzle in the tomb.
In the final puzzle room, there are four columns and each one has a switch
on it. Clicking the switch causes sand to fall and start filling up the room.
You need to click on the switches in the correct order and you need to move very
quickly. The correct order is the fourth column, followed by the second column,
then the third column, and then finally the first column. When you get all four
switches, the sand will stop flowing and the sarcophagus in the the middle of
the room will open to reveal blue Nabooti jewel. Walk over to claim it and then
run out of the Sphinx and return to your plane.
Kaya Forests
The next stop is the Kaya Forests. Go to the right of the plane once you land
and then jump onto the roof of the second hut. Then jump up into the trees and
you will find a gold nugget in one of the treetops. Jump down to the ground and
look for a giant tortoise shell. Go into your backpack and use the Opuntia
Fruit. You’ll walk over to the left and place it on the ground. The tortoise
will wake up and walk over to the fruit to eat it. Now go over to the small hole
where the tortoise was sitting and use the shovel in your backpack. You’ll
uncover an Ebony Elephant figure and two strange ghosts will
appear. Click on the one on the left and he’ll tell you to return a Fingo to him
for a reward. Head back to the plane.
Second Return Trip to Nabooti
Fly back to Nabooti and speak to the woman in the blue outfit. Trade the
elephant figurine for a Fingo. Now talk to the man and trade your gold nugget
for a digital camera. Head back to the plane.
elephant figurine for a Fingo. Now talk to the man and trade your gold nugget
for a digital camera. Head back to the plane.
Return to Kaya Forests
Fly back to the Kaya Forests and speak to the ghost again. Tell him you have
found the Fingo and he will give you the green Nabooti jewel as a reward. Go
back to the plane.
found the Fingo and he will give you the green Nabooti jewel as a reward. Go
back to the plane.
Safari
The next stop is the safari. Walk to the right and you’ll meet Big Zeke, who
runs the safari expedition. He’ll tell you that he needs to get seven good
pictures of different animals. Tell him you’ll help and he’ll take you to the
picture spot. This starts an easy mini-game where you need to take pictures of
animals that are hiding. Here’s how to find them all. Move the camera with your
mouse and click when you want to take the picture. Make sure the animal is
completely out of its hiding spot when you take the picture.
- There is a bird in the top left corner on a tree-top.
- You’ll find a giraffe in the middle, next to a tree.
- There is a zebra to the left of the giraffe.
- The lion is right next to the zebra, hiding in the
bushes. - There is a crocodile in the stream.
- You’ll spot an elephant on the right side.
- A gazelle will pop up in the bottom-right corner.
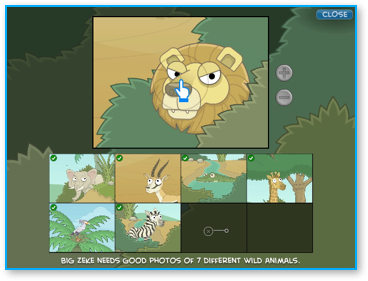
Getting pictures of all the animals at the safari.
Press the close button in the upper-right when you have all seven good pictures
and then Big Zeke will give you an old mining helmet as a gift for helping him
take the pictures. Head back to your plane.
and then Big Zeke will give you an old mining helmet as a gift for helping him
take the pictures. Head back to your plane.
Diamond Mines
Fly South until you get to the bottom of Africa and click on the dot for the
Diamond Mines. As soon as you arrive, open your backpack and put on the Miner’s
Hard Hat. The run all the way to the right until you pass an electric fence and
arrive at a control box with a dial and wires. Click on the switch between the
red and green lights to turn off the electric fence. It will only stay off for a
short time and a timer will appear in the lower left corner to show you how much
time is left before the electric fence turns back on. Now move quickly to the
left and run up to the top of the mound of dirt. Jump up onto the metal
structure and the run up it until you fall through the gap. Keep running to the
right until you reach a barrel of explosives below a hole in the fence wire.
Jump on the barrel and then jump up through the fence. Your cursor should say
ENTER here, so click to move to the next spot.
Run to the left until you get to a series of ramps. There are large red
metal explosives carts coming down the ramps. Keep jumping up the ramps while
avoiding the carts. Then go down into the chute where the carts are coming up
from.
When you arrive in the next spot, you’ll see a switch with a green light
and sparks shooting out of it. Click on the switch to turn it off. Then jump to
the left side of the explosives barrel on your left and push it to the right
until it stops against a rock. Some of the gunpowder leaks out of it as you push
it along. Go back to the switch and click on it to turn it on. The sparks will
light the gunpowder trail and then make the barrel and the rock explode. Turn
the switch off and repeat this one more time, by pushing a second explosives
barrel all the way to the far right where you’ll come up to a wall of rocks.
Turn the switch on and they’ll all explode, revealing a passageway to the
right.
Push the mine cart a little bit to the right and you’ll jump inside. Now
you just need to avoid obstacles by ducking at the top and jumping over the
stalagmites in the ground as you pass them. Time your jumps so that you jump as
soon as you see the signs telling you to do so and duck down well before the
cart nears the high points in the track. You’ll need to duck four times and jump
three times. When you reach the end, you’ll arrive in the next room.
Jump when the signs tell you to.
Run all the way to the right and climb up onto the wall. Then jump back to the
left onto the platform and then jump up again onto the second platform. There is
a large black rock with diamonds still inside it. Click on the rock and you’ll
play an easy mini-game where you need to find the final white Nabooti crystal
with a magnifying glass. The Nabooti crystal is the one with a tiny inscription
on it. It’s over on the left side and very easy to locate. Once you have it,
climb up the rope and head back to your plane.
Final Return to Nabooti
Now that you have all the crystals, fly back to Nabooti and go inside the
museum. Walk down to the bottom floor and speak with the woman next to the
statue again. Now you need to place the crystals inside the statue in the
correct order. From the bottom, the order is: yellow, orange, blue, white, red,
green, purple. Once all the crystals are in place, the statue will turn into a
spaceship and zoom into outer space. Congratulations, you’ve completed the
Nabooti Island mission. Claim your medal as a reward!
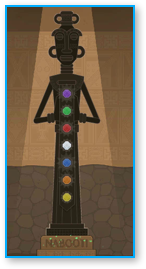
The Nabooti statue with all the crystals placed in the correct order.
BONUS: Secret Cell Phone Numbers
Don’t forget that you still have the cell phone that you found in the
Mountains of the Moon. You can use the cell phone to dial special numbers and
get secret items.
Mountains of the Moon. You can use the cell phone to dial special numbers and
get secret items.
- Dial 911 to get a cop outfit.
- Dial 411 to get a brain in a jar on your head.
- Dial 1337 to get a Ned Noodlehead outfit
