Counterfeit Island
Some of the world's most famous artwork is on display at the Island's museum,
but rumor has it someone's out to steal it. Can you explore the dark and
dangerous side of the online virtual world Counterfeit Island and save the
day in the cracking canvas caper?
but rumor has it someone's out to steal it. Can you explore the dark and
dangerous side of the online virtual world Counterfeit Island and save the
day in the cracking canvas caper?
Written Walkthrough
Your Arrival On Counterfeit Island
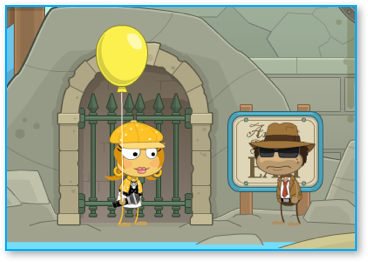
Follow the map to Counterfeit Island. You’ll arrive by balloon
right next to the museum. Start running all the way to the right and head to the
Downtown area. When you arrive, the first store you’ll see is called Bobo’s
Clown Store. Go inside. You’ll see several colored balloons inside. Click on the
green one to pick it up and then leave the clown store.
EXTRA: you can jump up on the roof of the store to talk with
Bobo the clown. He’ll tell you why he’s up on the roof. It’s not necessary to
talk with him to complete this quest.
Now head all the way to the right and enter the Countryside zone. Walk a
little bit further to the right and you’ll come across a crying boy and a young
woman holding a red balloon. Click on the crying boy and you will give him your
green balloon. Once he has it he’ll fly up and away into the air. Poor balloon
boy! Oh well, he’s not your problem right now. Head back to the left to go
Downtown and then run all the way to the left of that zone and go into Main
Street. When you arrive at Main Street, go inside the Web Browser
Internet Cafe. Once you’re inside, walk to the right and talk to the
bearded guy wearing the hat and camera. He’ll tell you that he lost his tunnel
tour tickets and that if you can find them, he’ll give you one. While you’re
talking to him, look up at the TV behind you. It’s balloon boy on the news! Head
back out of the cafe and then go to the right and go to Downtown.
Your next stop is the garbage can just to the right of the entrance to the
underground tunnel tour. Click on the garbage can and a screen will appear
showing all garbage inside. Click on each piece and drag it away from the
center. Soon, you’ll reveal the lost tickets that are buried inside. Click on
the tickets and they’ll go into your backpack.
OK, now run back to Main Street and enter the Web Browser Internet Cafe
again. Go inside and stand next to the man who lost the tickets. Open up your
backpack and find the tickets and then click on “Use”. The guy will thank you
for finding them and just as he promised, he’ll give one back to you so that you
can use it to take the underground tunnel tour. And that’s exactly where we go
next!
EXTRA: On your way back Downtown to go to the underground
tunnel tour, you can stop in at Bobo’s Clown Store again to pick up another
balloon. I think it makes getting the torn picture in the tunnel a little bit
easier, but this is optional.
OK, head back Downtown and go to the entrance to the underground tunnel
tour. There’s a woman standing outside wearing a green beret. Stand next to her,
then open your backpack and click “Use” on the ticket inside. Next, click on the
gate behind you to start the tour.
The tunnel tour is very easy to do, because there’s just one path to
follow. When you get to the bottom, you’ll see a lightbulb hanging down from a
cable in the middle of the tunnel. Jump up onto this cable and climb to the top.
You’ll see a torn piece of paper on top of another cable just to the right. This
is part of the torn picture that you’ll need to unlock the secret door to the
museum later in the quest. Climb all the way to the top of the cable and jump to
the right. This is really easy if you’re carrying a balloon from Bobo’s Clown
Store. When you pass over the torn picture, you’ll pick it up. Keep following
the main tunnel until you see a stone staircase heading up out of a door. Follow
the stairs to leave the tour.
The Mysterious Guy
Right after you exit the tour, you’ll meet a mysterious man standing next to the
exit. He’ll tell you a story and ask you to get a job at the museum, then meet
him in this same spot after nightfall. Now head up the sand to the right and
you’ll see another torn piece of the picture. Pick this one up. Before leaving
this area, run across the docks to the left and jump up to the top of the mast
on the fishing boat to find your third piece of the torn picture. Now head back
to Main Street and enter the museum.
Inside the Museum
Talk to the security guard inside the museum and he will tell you to go speak
with the assistant curator. The assistant curator is up the stairs right above
the entrance. Go up and talk to him. He will tell you that four paintings have
been placed in the wrong wings of the museum and that he needs you to put them
in their correct spots. In each wing, you can pick up one painting on the wall
(the others won’t move) and take it somewhere else. Here’s where all the
paintings should go.
When you’re done placing all of the paintings, go back and speak to the
assistant curator. He’ll tell you that you are hired and will take you inside
the Forgery Detection Lab to begin your training. Speak to him and then he’ll
tell you to select a station to begin your training. Click on the first desk to
get started. Use the X-Ray device over each of the paintings until you find the
one with the sketch marks underneath the painting. Use the arrows at the top to
switch between the paintings and then click on the one you think is the real
painting below.
In the next test, you’ll use a magnifying glass to try and figure out
which painting is a fake. Look in the corners of each painting to find the
signature and figure out which one is different than the others. That is the
forged painting.
The third test is a photograph and you need to click on the area that
shows it is a fake. Move up to the left to where the moon is and click on the
dark side of the moon to prove that this photo is a fake. If this was really a
picture of the moon, there would be no stars on the dark side of it.
Now move to the next station, where the museum does chemical analysis of
paint samples. In this test, you select a paint sample and then it drops into
the beaker. A red bar moves across and when it reaches a square, that square
lights up with a color. Click on that color beaker above while the square is lit
to add it into the test solution. If you do it correctly and in time, a green
check mark will appear over the square. Keep going until all four squares are
done correctly. Now repeat the whole process for the remaining two paint
samples. Once you finish this test, your training is complete and the assistant
curator will give you a key to the supply room.
Leave the forgery detection lab and walk right and then follow the signs
to the statue room and security office. Walk left past the statues and follow
the sign to the security office and supply closet. Walk all the way to the left
and you’ll find the door to the supply closet. Use the key from your backpack to
unlock it and get inside. Once you walk in, you’ll find the sixth and final
piece of the torn picture, which will complete to form the image of a gargoyle
head.
Now walk back to the right and go back through the statue room. Follow the
sign to the main hall and then exit the museum. Now it is night time outside.
Head left and go to the city docks. The mysterious guy in the had and sunglasses
will still be standing where you left him. Go inside the gate to the underground
tour area and then follow the tunnel back to the wooden ladder. Climb the ladder
and then click on the hatch at the top. The hatch cover will appear on screen
and it has a gargoyle face on it. Re-arrange the pieces on the hatch to match
the version you see in the torn picture. All of the features have to match the
picture exactly. When you’re done, the hatch will open and you can proceed up
through it.
You’ll arrive inside the supply closet in the museum. Use your supply room key to unlock the door from the
inside and then go into the hall. Watch out because the shadow of the security
guard will walk by the window to the security office. Wait for her to go by and
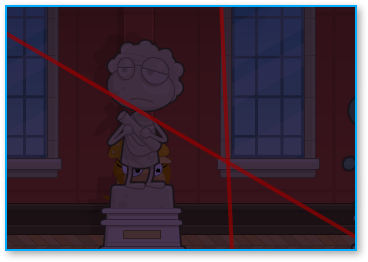
then run past the window all the way to the statue room door. Go inside and then
move across the room carefully, avoiding the laser beams. You are safe from
being spotted by a laser beam when you’re hiding behind something, like a statue
or potted plant. Once you arrive at the far end of the room, exit to go to the
main museum hall.
From here, go up and to the left to where the painting of the Scream is
located. Click on the top of it and you will jump up onto the light hanging
above it. All of the sudden the museum alarms will go off and the police will
arrive. You’ve been framed! You’ll be placed in jail and then questioned by the
police. You will take a lie detector test which is very easy to pass. Then
you’ll be asked to join the chief inspector over at the museum security
office.
On the way back to the museum office, stop inside Bobo’s clown shop, where
you’ll find the security guard from the museum. Ask him what time he left his
post and he will give you his time card. After you get it, head to the museum
and go up to the security office. Once you arrive, walk to the right and click
on the big computer. You’ll automatically check the security camera footage and
because you have the time card from the security guard, you’ll know where to
look. You will see the mysterious guy appear and walk up to the painting. Press
the print screen button to get a surveillance video screen print. Then go over and
talk to the investigator. She will tell you to show the picture to the people in
town. Leave the museum and head right towards Bobo’s Clown Shop.
When you arrive outside the clown shop, show the surveillance video screen
print to one of the mimes. The mime will pretend to play music, which is a clue
that the mysterious guy you’re looking for is hiding in the jazz cafe. Go right
and then enter the cafe. When you arrive inside the cafe, walk to the right and
the mysterious man will be there. He will run away from you. Follow him to the
right to begin a big chase.
During the chase scene, you’ll be riding on a scooter trying to catch the
mysterious guy. You don’t really need to catch him during this part. All you
need to do is avoid the different obstacles that appear in the road as you go
by. The chase lasts for a minute or two and you’ll arrive at the Docks. The
thief will escape in a waiting motor boat but will drop a key card which you
will pick up.
EXTRA: keep an eye out in the beginning of the chase for
Balloon Boy. He will appear up in the sky between the buildings in the
background.
Your next stop is the museum. When you arrive in the main lobby, the
assistant curator will be waiting for you and give you a package that arrived
addressed to you. It’s a painting of Vincent Van Gogh’s Starry Night, and
there’s also an x-ray device included. Open your backpack and click on the
Examine button on the painting to take a closer look. Drag the x-ray device over
the painting and you’ll see a secret message from the curator telling you to
meet at the Pop Art Museum in Early Poptropica island. This is a fun part where
you now have to leave Counterfeit Island and go to Early Poptropica. Head back
outside and return to your travel balloon, which is just to the right of the
museum entrance. Choose Early Poptropica on the map.
Walk left to the Pop Art Museum and then go inside. Walk a little bit to
the left and you’ll find an older woman wearing purple clothes. Talk to her and
she will explain a little bit about what is going on and give you a key. Exit
the museum, go back to your travel balloon, and head back to Counterfeit
Island.
When you arrive back in Counterfeit Island, run all the way to the right
to the Countryside. You’ll see the Inspector’s house here and you can use the
key that the Curator gave to you to get inside. Head upstairs and you’ll see a
painting hanging on the wall. Click on it to remove the canvas and you’ll see
that it’s hiding the stolen painting from the museum! But then the lights will
go out. and you’ll be knocked unconscious.
When you awake, you’ll be deep inside an underground hideout. Both you and
the mysterious thief will be tied to chairs and you are captives of the Black
Widow, the world’s greatest art thief. The Black Widow will leave the room and
then you and the mysterious guy will talk about how you were both set up by her.
He’ll tell you to move your chair close to him so that he can untie you. To move
your chair, click and drag your mouse to the left. It will slowly move towards
the guy. Once you get next to him, you’ll both escape the chairs and he’ll
suggest that you both go after the Black Widow. Head out of the room to the
right.
You’ll arrive in the next room. Run all the way to the left and then jump
up on the boxes while avoiding the guards. The hardest guard to sneak past is on
one of the platforms right above you. You need to wait until he gets all the way
to the left and then turns and starts walking right. Jump up immediately and
follow him a few steps until you see a couch. Jump onto the couch and the
springs will propel you to the platform above and to the left. Here you’ll see a
special access panel. Use the key card you found when you were chasing the
mysterious guy before to open the door. Go through the door to enter Black
Widow’s private gallery. Then walk to the left to begin the final confrontation
with Black Widow.
The mysterious guy will run and jump onto a platform with a handle. You
need to turn the handle to raise the platform up so that he can catch her. But
once he does that, the Black Widow will start dropping art onto the ground,
destroying it. You need to catch the art to keep it from breaking while
continuing to try and turn the handle to raise the platform. This is a really
tough part to finish! If more than one million dollars of art breaks, you’ll
fail and have to start this part over again. But after every four pieces you
save, she’ll get really mad and then you have a few seconds to run over to the
platform to turn the handle. But watch out because after a few seconds, she’ll
throw a bomb towards you. You need to avoid getting hit by the exploding bomb
and then return to the middle to try and catch four more pieces of art. Keep
repeating the cycle until you raise the platform all the way to the top.
Once you’re done, the Black Widow will be captured! You’ll appear inside
the Internet Cafe and the Curator will be there. She’ll tell you to meet her at
the museum. Go there and then the Curator will show you that the museum has been
the secret hiding place for some of the most famous works of art in the world.
You’ll receive the medallion for finishing Counterfeit Island.
Congratulations!
with the assistant curator. The assistant curator is up the stairs right above
the entrance. Go up and talk to him. He will tell you that four paintings have
been placed in the wrong wings of the museum and that he needs you to put them
in their correct spots. In each wing, you can pick up one painting on the wall
(the others won’t move) and take it somewhere else. Here’s where all the
paintings should go.
- Move the painting from the cubism wing to the impressionism wing.
- Move the painting from the impressionism wing to the expressionism
wing. - Move the painting from the expressionism wing to the realism wing.
- Move the painting from realism wing to the cubism wing.
When you’re done placing all of the paintings, go back and speak to the
assistant curator. He’ll tell you that you are hired and will take you inside
the Forgery Detection Lab to begin your training. Speak to him and then he’ll
tell you to select a station to begin your training. Click on the first desk to
get started. Use the X-Ray device over each of the paintings until you find the
one with the sketch marks underneath the painting. Use the arrows at the top to
switch between the paintings and then click on the one you think is the real
painting below.
In the next test, you’ll use a magnifying glass to try and figure out
which painting is a fake. Look in the corners of each painting to find the
signature and figure out which one is different than the others. That is the
forged painting.
The third test is a photograph and you need to click on the area that
shows it is a fake. Move up to the left to where the moon is and click on the
dark side of the moon to prove that this photo is a fake. If this was really a
picture of the moon, there would be no stars on the dark side of it.
Now move to the next station, where the museum does chemical analysis of
paint samples. In this test, you select a paint sample and then it drops into
the beaker. A red bar moves across and when it reaches a square, that square
lights up with a color. Click on that color beaker above while the square is lit
to add it into the test solution. If you do it correctly and in time, a green
check mark will appear over the square. Keep going until all four squares are
done correctly. Now repeat the whole process for the remaining two paint
samples. Once you finish this test, your training is complete and the assistant
curator will give you a key to the supply room.
Leave the forgery detection lab and walk right and then follow the signs
to the statue room and security office. Walk left past the statues and follow
the sign to the security office and supply closet. Walk all the way to the left
and you’ll find the door to the supply closet. Use the key from your backpack to
unlock it and get inside. Once you walk in, you’ll find the sixth and final
piece of the torn picture, which will complete to form the image of a gargoyle
head.
Now walk back to the right and go back through the statue room. Follow the
sign to the main hall and then exit the museum. Now it is night time outside.
Head left and go to the city docks. The mysterious guy in the had and sunglasses
will still be standing where you left him. Go inside the gate to the underground
tour area and then follow the tunnel back to the wooden ladder. Climb the ladder
and then click on the hatch at the top. The hatch cover will appear on screen
and it has a gargoyle face on it. Re-arrange the pieces on the hatch to match
the version you see in the torn picture. All of the features have to match the
picture exactly. When you’re done, the hatch will open and you can proceed up
through it.
You’ll arrive inside the supply closet in the museum. Use your supply room key to unlock the door from the
inside and then go into the hall. Watch out because the shadow of the security
guard will walk by the window to the security office. Wait for her to go by and
then run past the window all the way to the statue room door. Go inside and then
move across the room carefully, avoiding the laser beams. You are safe from
being spotted by a laser beam when you’re hiding behind something, like a statue
or potted plant. Once you arrive at the far end of the room, exit to go to the
main museum hall.
From here, go up and to the left to where the painting of the Scream is
located. Click on the top of it and you will jump up onto the light hanging
above it. All of the sudden the museum alarms will go off and the police will
arrive. You’ve been framed! You’ll be placed in jail and then questioned by the
police. You will take a lie detector test which is very easy to pass. Then
you’ll be asked to join the chief inspector over at the museum security
office.
On the way back to the museum office, stop inside Bobo’s clown shop, where
you’ll find the security guard from the museum. Ask him what time he left his
post and he will give you his time card. After you get it, head to the museum
and go up to the security office. Once you arrive, walk to the right and click
on the big computer. You’ll automatically check the security camera footage and
because you have the time card from the security guard, you’ll know where to
look. You will see the mysterious guy appear and walk up to the painting. Press
the print screen button to get a surveillance video screen print. Then go over and
talk to the investigator. She will tell you to show the picture to the people in
town. Leave the museum and head right towards Bobo’s Clown Shop.
When you arrive outside the clown shop, show the surveillance video screen
print to one of the mimes. The mime will pretend to play music, which is a clue
that the mysterious guy you’re looking for is hiding in the jazz cafe. Go right
and then enter the cafe. When you arrive inside the cafe, walk to the right and
the mysterious man will be there. He will run away from you. Follow him to the
right to begin a big chase.
During the chase scene, you’ll be riding on a scooter trying to catch the
mysterious guy. You don’t really need to catch him during this part. All you
need to do is avoid the different obstacles that appear in the road as you go
by. The chase lasts for a minute or two and you’ll arrive at the Docks. The
thief will escape in a waiting motor boat but will drop a key card which you
will pick up.
EXTRA: keep an eye out in the beginning of the chase for
Balloon Boy. He will appear up in the sky between the buildings in the
background.
Your next stop is the museum. When you arrive in the main lobby, the
assistant curator will be waiting for you and give you a package that arrived
addressed to you. It’s a painting of Vincent Van Gogh’s Starry Night, and
there’s also an x-ray device included. Open your backpack and click on the
Examine button on the painting to take a closer look. Drag the x-ray device over
the painting and you’ll see a secret message from the curator telling you to
meet at the Pop Art Museum in Early Poptropica island. This is a fun part where
you now have to leave Counterfeit Island and go to Early Poptropica. Head back
outside and return to your travel balloon, which is just to the right of the
museum entrance. Choose Early Poptropica on the map.
Walk left to the Pop Art Museum and then go inside. Walk a little bit to
the left and you’ll find an older woman wearing purple clothes. Talk to her and
she will explain a little bit about what is going on and give you a key. Exit
the museum, go back to your travel balloon, and head back to Counterfeit
Island.
When you arrive back in Counterfeit Island, run all the way to the right
to the Countryside. You’ll see the Inspector’s house here and you can use the
key that the Curator gave to you to get inside. Head upstairs and you’ll see a
painting hanging on the wall. Click on it to remove the canvas and you’ll see
that it’s hiding the stolen painting from the museum! But then the lights will
go out. and you’ll be knocked unconscious.
When you awake, you’ll be deep inside an underground hideout. Both you and
the mysterious thief will be tied to chairs and you are captives of the Black
Widow, the world’s greatest art thief. The Black Widow will leave the room and
then you and the mysterious guy will talk about how you were both set up by her.
He’ll tell you to move your chair close to him so that he can untie you. To move
your chair, click and drag your mouse to the left. It will slowly move towards
the guy. Once you get next to him, you’ll both escape the chairs and he’ll
suggest that you both go after the Black Widow. Head out of the room to the
right.
You’ll arrive in the next room. Run all the way to the left and then jump
up on the boxes while avoiding the guards. The hardest guard to sneak past is on
one of the platforms right above you. You need to wait until he gets all the way
to the left and then turns and starts walking right. Jump up immediately and
follow him a few steps until you see a couch. Jump onto the couch and the
springs will propel you to the platform above and to the left. Here you’ll see a
special access panel. Use the key card you found when you were chasing the
mysterious guy before to open the door. Go through the door to enter Black
Widow’s private gallery. Then walk to the left to begin the final confrontation
with Black Widow.
The mysterious guy will run and jump onto a platform with a handle. You
need to turn the handle to raise the platform up so that he can catch her. But
once he does that, the Black Widow will start dropping art onto the ground,
destroying it. You need to catch the art to keep it from breaking while
continuing to try and turn the handle to raise the platform. This is a really
tough part to finish! If more than one million dollars of art breaks, you’ll
fail and have to start this part over again. But after every four pieces you
save, she’ll get really mad and then you have a few seconds to run over to the
platform to turn the handle. But watch out because after a few seconds, she’ll
throw a bomb towards you. You need to avoid getting hit by the exploding bomb
and then return to the middle to try and catch four more pieces of art. Keep
repeating the cycle until you raise the platform all the way to the top.
Once you’re done, the Black Widow will be captured! You’ll appear inside
the Internet Cafe and the Curator will be there. She’ll tell you to meet her at
the museum. Go there and then the Curator will show you that the museum has been
the secret hiding place for some of the most famous works of art in the world.
You’ll receive the medallion for finishing Counterfeit Island.
Congratulations!